
I really liked the old style door within a door idea, mainly because i thought that i could probably get some nice shapes/textures out of the final version. I knew that i didn't want to make a door that looked clean and that i was after a door i could make look dark and gritty so to speak.
The very first stages of building on my door wasn't easy, i encountered many problems with the building of the archway, there were many spare edges and faces that weren't supposed to be there, i had to manually look through the mesh to find parts where it would deform due to extrusion. I wanted to get the most out of one shape before creating another one. The bottom section of the archway was a seperate object and i linked the two pieces together using the merge vertex tool. The half was then mirrored and attatched together to creat a whole shape.
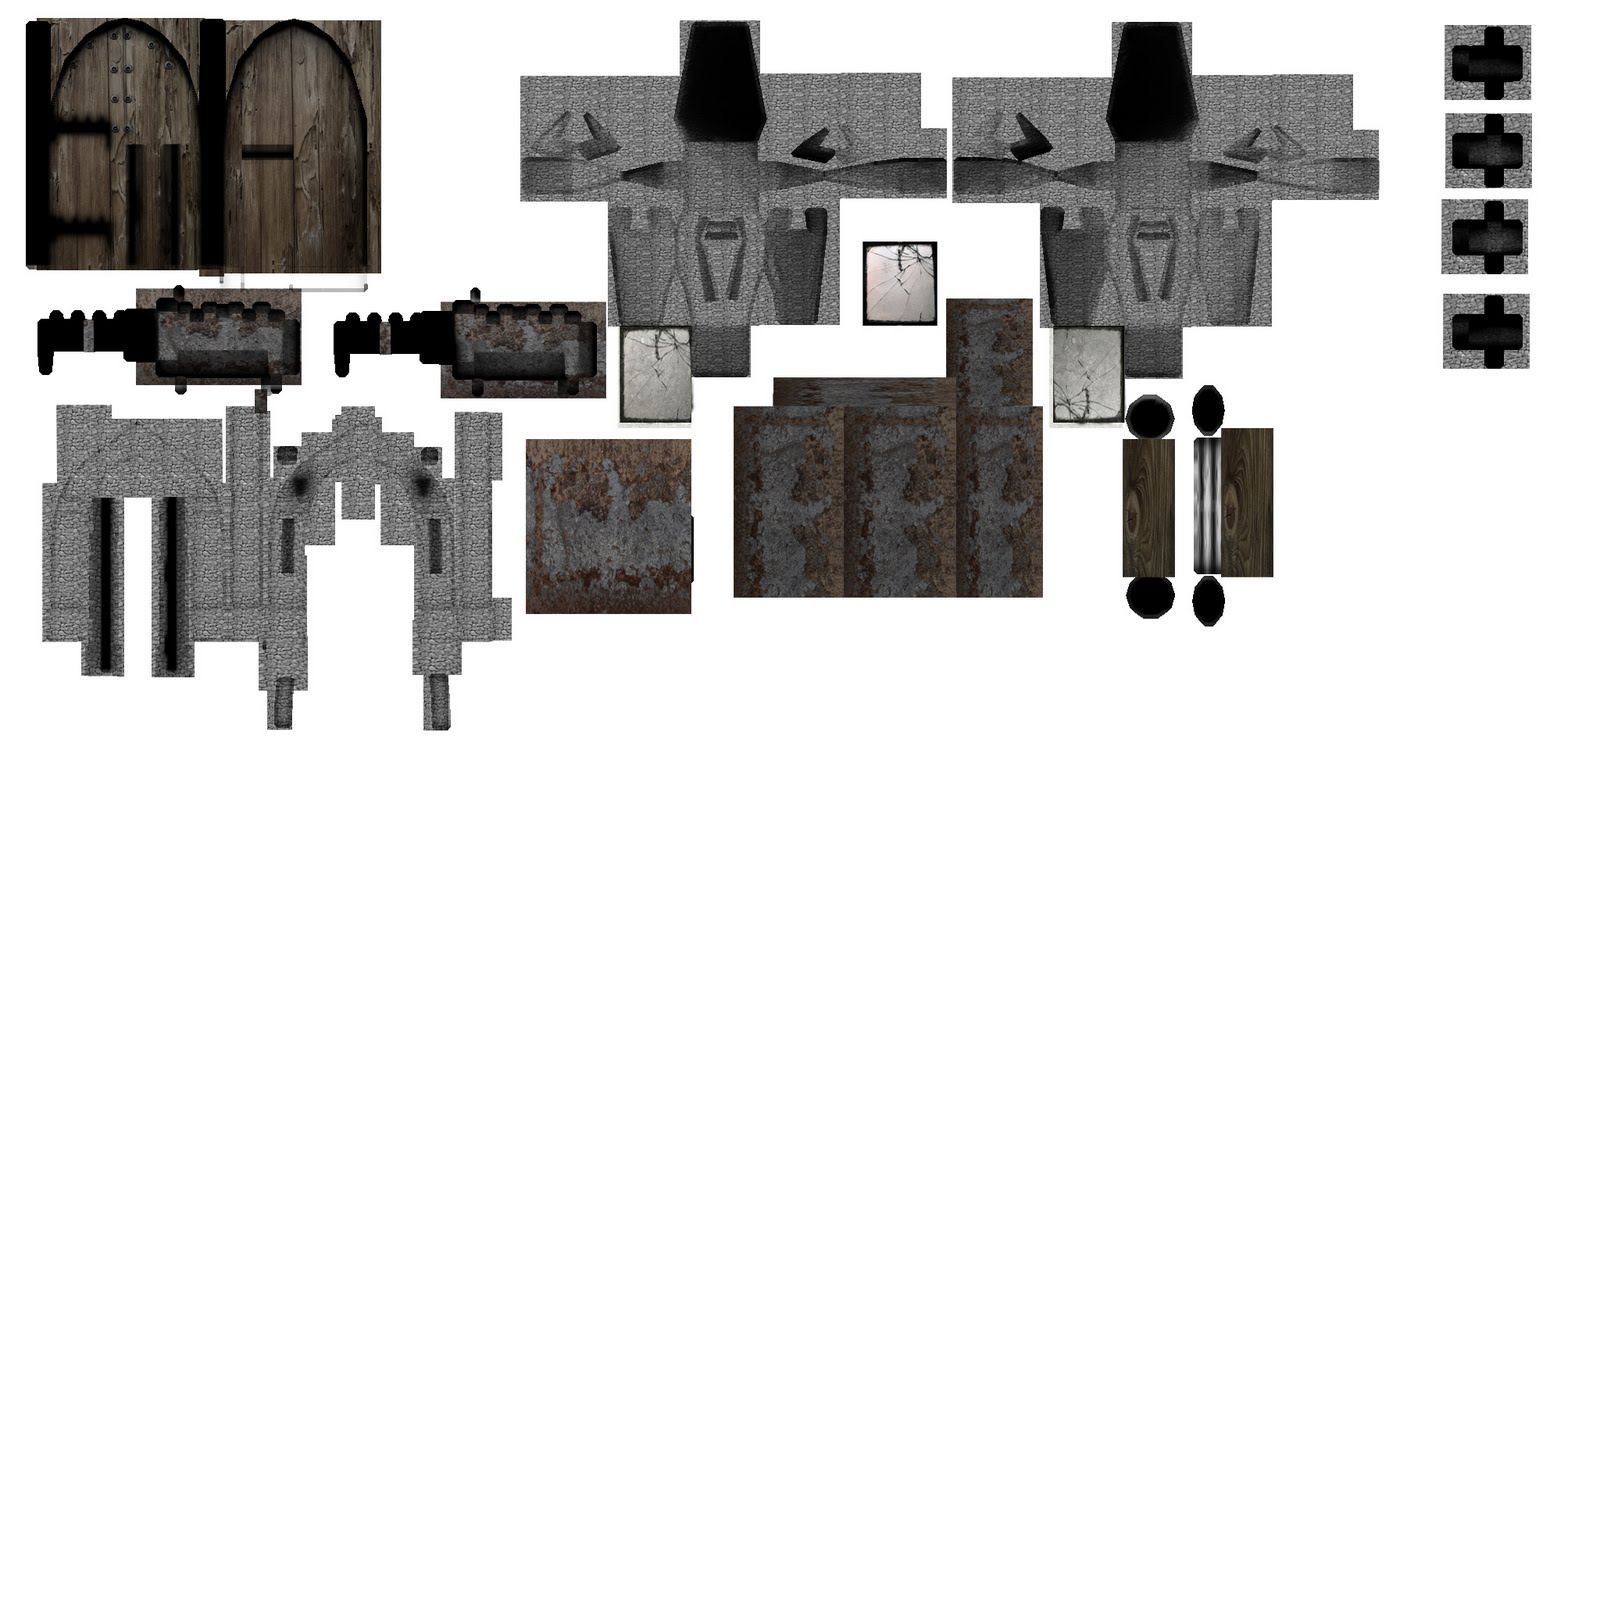
The door itself was simple to model, The large one on the inside was made from a rectangle that was subdivided by 10, i then altered the height of each edge across the top to fit within the archway, Once the round shape was aquired i then used the insert edge loop tool, altered the settings to multiple edge loops/4 and then added some subdivisions the door to make it possible to cut a rectangle shape out of the right hand side faces to insert the smaller door, the smaller door was just a rectangle with some subdivisions to make sculpting easier.
I created some lamps to go on either side of the archway, one was created and then mirrored onto the other side. Within the entire shape i tried to keep the geometry as simple as possible. as i was originally creating the door i began to get carried away and became too intricate with the extruding. I then decided to start again to make the shame shape but keep it simple. i wanted the detail to be in the normal maps and not the initial modelling.

Once my door was modelled it was time to uv map, I had never done this before and originaly thought it would be this extremely complicated process. after a technitian sat down with me for ten minutes and showed me how to do it i realised it wasnt hard as it was much more time consuming and tedious, However due to the way my door was modelled i didn't have any troubles doing the uv's. The problem i did have though which i encountered later was that once my uv's were done i didn't enlarge them across the whole sheet. this would make texturing later difficult because the textures were more blurry than they should have been. As much of a headache as this was i have learned from it and i won't make the same mistake next time.

the correct sides were mapped out, i did this by using the planar mapping tool, changing the settings to project the correct orthographic view. This was easy to follow due to the little indicator on the bottom left of the workplane. I stitched the uv's together where it made sense, for example if the uv's would deform due to being stitched together i wouldnt do it. instead i would place the uvs next to each other but leave them where they were.
Again i don't have many pictures of the mudbox sculpt due to my memory stick not having enough space instead i will explain what i did and what issues i had.
Once the uv selection was exported into mudbox the edges were wrong and the mesh would deform as i would up the subdivision levels, this was fixed by going into the "add subdivision level" tool and turning off smooth edges. After that the objects would increase in level nicely. A mistake i made however was bring every object in at once, this made sculpting more difficult than it should have been and the normal mapping was more tedious, but that was the only issue i had everything else went smoothly.
Using an image of a stone wall texture i aquired from the internet i brought it into photoshop and traced over it using a mix of black and white brushes, the white would be brought out in 3d more than the black so i highlighted desired areas to achieve this effect.
Then in mudbox i used a selection of stencils to create a 3d texture for each section of my door, nothing was hugely brought out but it gave the door the detail i was after and couldnt model in maya.
After everything was stenciled out i put an ambient occlusion map over my entire sculpt, this would bring out some natural shadowing giving the mesh some more detail. using this effect i brought the mesh back into maya and took a uv snapshop of the entire model as follows..

Using this image i took it into photoshop and began my texturing, if i set the background layer as "multiply" i was able to put images and textures over my uv snapshot but still keep the shadowing detail thanks to the ambient occlusion map, but the layers of texturing needed to be underneath the uv layer to keep this effect.
Using basic blinn shaders i went into the material attributes in maya and then added the texture map from photoshop onto the entire object, once this was all applied it was ready to normal map from my mudbox sculpt.

i created my normal maps by selecting each individual object in mudbox and created a high poly version and a low poly version using the layer options. Then with one single object selected i went into mesh/extract texture maps. under the normal map section i selected the low poly layer as the (low resolution mesh) and the corresponding high poly layer as the outcome. saved each individual normal map to the same place and then compiled togethr using the program crazy bump. The problem i did have though was the uv's being too small and not covering the entire sheet. this made my textures rather blurry up close but the normals were able to mask a lot of it which was helpful. in the future i'll definately make sure to not make this mistake twice.
with the final render i used a dark orange light to simulate the setting of the door, to put it into an environment that would most suit it.
